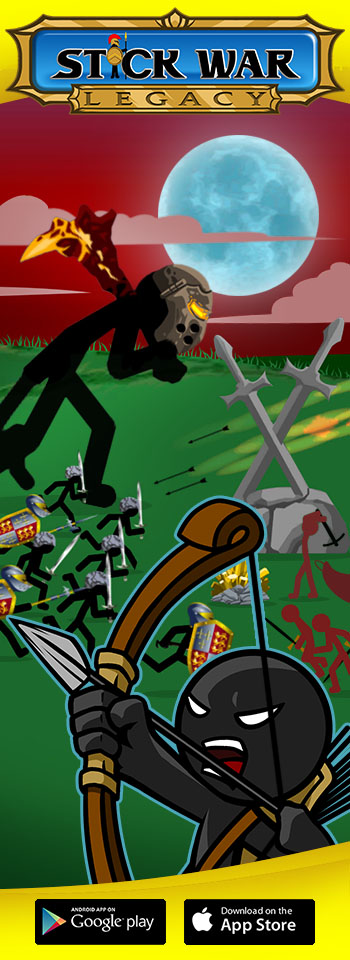
Stick War Strategy Guideby: Jason Whitham (CRAZY JAY) & Brock White |
|

Controls:
| Take control of a character: | |||||
| Miner | Archidon | ||||
| Mine gold | Aim and fire | ||||
| Move | Move | ||||
| Swordwrath (and Magikill Minion) | Magikill | ||||
| Attack | Stun / Attack | ||||
| Block | Summon minions | ||||
| Move | Move | ||||
| Spearton | Giant | ||||
| Attack | Attack | ||||
| Block | |||||
| Throw Spear | Move | ||||
| Move | |||||
Choosing Your Upgrades:
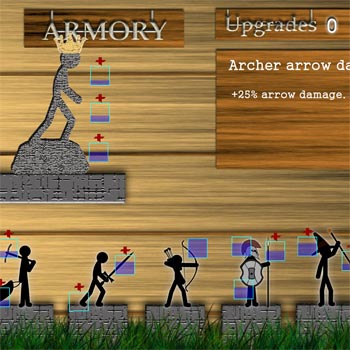 Each time you complete a stage you get 2 upgrade points, deciding
where you place these upgrades will affect your strategy early in the
game. Knowing what type of player you are might help you choose.
Are you aggressive? If so perhaps you'll want to upgrade your swordwrath
or speartons to be ultra powerful. Do you prefer economic might? If so
you should put your points into your miner and
statue income upgrades. Perhaps you're like me, the cheap type? In
that case sit back and let your archidons do all the work. The point
is that there are several allies you can choose and none is right or
wrong. However, focusing on only one strategy could make certain stages
more difficult. If I was to make one recommendation on this I would
say, don't spread your points too thin, and don't put them all into one area.
Each time you complete a stage you get 2 upgrade points, deciding
where you place these upgrades will affect your strategy early in the
game. Knowing what type of player you are might help you choose.
Are you aggressive? If so perhaps you'll want to upgrade your swordwrath
or speartons to be ultra powerful. Do you prefer economic might? If so
you should put your points into your miner and
statue income upgrades. Perhaps you're like me, the cheap type? In
that case sit back and let your archidons do all the work. The point
is that there are several allies you can choose and none is right or
wrong. However, focusing on only one strategy could make certain stages
more difficult. If I was to make one recommendation on this I would
say, don't spread your points too thin, and don't put them all into one area.
Pro tip: If you don't use your points in a round they do carry over! If you find the early levels simple, you might find some advantage in saving your points. Be warned however, if you save your points and then go on to the next stage, you wont get a chance to use them until you pass that level, and since you didn't use any upgrades that level might be quite hard for you… see what I'm getting at?
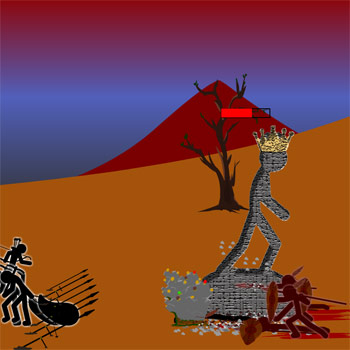
Stage 1, Archidonis:
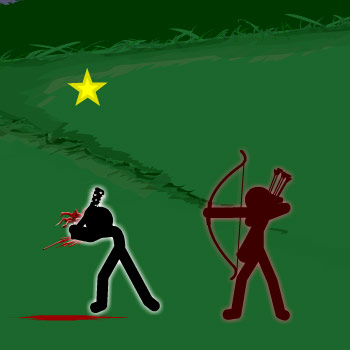 Take out those pesky Archidons!
If you get a club man out early you should take control of him by clicking him with the mouse and controlling him with WASD/arrow keys, and space to attack.
The advantage of controlling the unit yourself is that your attack is more powerful as well as your defense. Not only that, when you face an you should be able to move up and down the plane while running towards the , almost like a zig zag pattern which will make it much more difficult for the archidons to hit you. Once you're up close you will dominate.
Take out those pesky Archidons!
If you get a club man out early you should take control of him by clicking him with the mouse and controlling him with WASD/arrow keys, and space to attack.
The advantage of controlling the unit yourself is that your attack is more powerful as well as your defense. Not only that, when you face an you should be able to move up and down the plane while running towards the , almost like a zig zag pattern which will make it much more difficult for the archidons to hit you. Once you're up close you will dominate.
Stage 2, Survive Until the Sun Sets:
 s no good!
You just got a new unit and you're dying to try it out. Well we're mean because we give you an enemy with a big shield and spear perfect for killing new archidons. None of your units are powerful enough yet, so you will have to adapt a new tactic of outnumbering your opponent, because 3 clubs is better then 1 spear.
Man the fort!
If you can't seem to keep up with the pace of native attacks this is the time to learn one of the most important moves of the game, "Man the Fort." This will keep your army safe and also give you a chance to fire back at the enemy. Your arrows fired from this point are only as powerful as what you have upgraded on your statue, and is unrelated to the archidons upgrade. Every 3 men you have garrisoned or fortified will give you one garrisoned , with a 20 unit max you can have up to 6 garrisoned archidons.
s no good!
You just got a new unit and you're dying to try it out. Well we're mean because we give you an enemy with a big shield and spear perfect for killing new archidons. None of your units are powerful enough yet, so you will have to adapt a new tactic of outnumbering your opponent, because 3 clubs is better then 1 spear.
Man the fort!
If you can't seem to keep up with the pace of native attacks this is the time to learn one of the most important moves of the game, "Man the Fort." This will keep your army safe and also give you a chance to fire back at the enemy. Your arrows fired from this point are only as powerful as what you have upgraded on your statue, and is unrelated to the archidons upgrade. Every 3 men you have garrisoned or fortified will give you one garrisoned , with a 20 unit max you can have up to 6 garrisoned archidons.
Stage 3, Swordwrath:
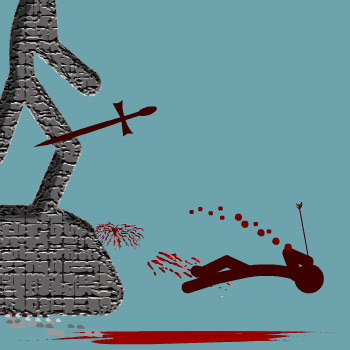 s are good!
Now you will learn the power of the almighty head shot! At this point it's likely you have used some of your upgrade points on increasing the which was wise because swordwrath are very strong up close and will slice your club men in half. If the gets a head shot on the swordwrath it's over; one shot one kill, with this they will quickly pay for themselves.
Arrows vs statues!
Ok so you love the and you decided to make and entire army of just archidons? The problem you'll face is that the is strong against bare flesh but not against the stone statue. It will take forever for you to destroy it with just archidons. Thats why you have the club men! Although they are weak and pathetic they still serve a purpose, and don't worry I have a feeling you will be getting some swords soon enough!
Pro tip: Swordwrath can block with Q
s are good!
Now you will learn the power of the almighty head shot! At this point it's likely you have used some of your upgrade points on increasing the which was wise because swordwrath are very strong up close and will slice your club men in half. If the gets a head shot on the swordwrath it's over; one shot one kill, with this they will quickly pay for themselves.
Arrows vs statues!
Ok so you love the and you decided to make and entire army of just archidons? The problem you'll face is that the is strong against bare flesh but not against the stone statue. It will take forever for you to destroy it with just archidons. Thats why you have the club men! Although they are weak and pathetic they still serve a purpose, and don't worry I have a feeling you will be getting some swords soon enough!
Pro tip: Swordwrath can block with Q
Stage 4, Speartons:
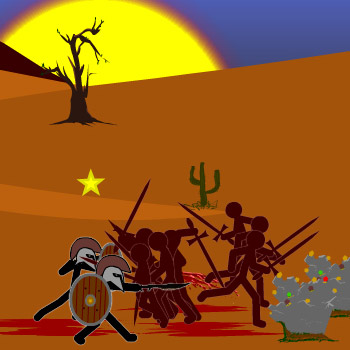 Madness!
The Speartons are deadly, they can throw their spears and pull out a sword and keep on fighting. They also have shields and helmets which protect them from headshots and minimize damage from swords and arrows, so what will you do? Hopefully you have invested some upgrade points into your sword, because you will need a good combination of swordwrath and archidons to win here. I recommend more swordsmen then archidons. You really need to use numbers here, the Persians had the right idea, trust me.
Stop sitting back!
This is a great chance to play your units individually and try to pick off some of there miners, Because they have better units then you, and both sides are limited to the same number of units, which in short means: if you both have maxed out armies they will win. This means you're going to have to be on the offensive.
Madness!
The Speartons are deadly, they can throw their spears and pull out a sword and keep on fighting. They also have shields and helmets which protect them from headshots and minimize damage from swords and arrows, so what will you do? Hopefully you have invested some upgrade points into your sword, because you will need a good combination of swordwrath and archidons to win here. I recommend more swordsmen then archidons. You really need to use numbers here, the Persians had the right idea, trust me.
Stop sitting back!
This is a great chance to play your units individually and try to pick off some of there miners, Because they have better units then you, and both sides are limited to the same number of units, which in short means: if you both have maxed out armies they will win. This means you're going to have to be on the offensive.
Stage 5, Swordwrath Counter:
Get that gold!
You have been warned that an attack is coming so don't waste your money right away on an army that you won't use. Spend your money on miners, and get as much gold as you can, and spend it all as late as you can. Don't forget that some units take longer to train then others. So if you try to make 5 speartons quickly you could die waiting on them to train.
Meat shield!
Speartons wear solid armor from head to toe, make good use of it. They are a good combo not only with archidons but with swordwrath because speartons will automatically take the front line and take the first damage which gives your swordwrath a chance to come in and counter attack.
Stage 6, Magikill:
 Stunning spells!
Magikill might just make you rip your hair out when you first encounter them, you might even feel like there is no way around them or they are just too hard. But they are designed to force you to keep thinking up new strategy and not keep playing the same old way. For example, if you try the meat shield method on magikill they will just stun you over and over and create minions to finish you off. Their weakness is archidons and distance. You may need to fortify quickly to sucker the magikill into getting too close at times.
Attack or be attacked
You have to keep in mind that magikill are very powerful but are also equally expensive for the enemy to create. Without miners to get gold there will be no magikill for the enemy to train.
Stunning spells!
Magikill might just make you rip your hair out when you first encounter them, you might even feel like there is no way around them or they are just too hard. But they are designed to force you to keep thinking up new strategy and not keep playing the same old way. For example, if you try the meat shield method on magikill they will just stun you over and over and create minions to finish you off. Their weakness is archidons and distance. You may need to fortify quickly to sucker the magikill into getting too close at times.
Attack or be attacked
You have to keep in mind that magikill are very powerful but are also equally expensive for the enemy to create. Without miners to get gold there will be no magikill for the enemy to train.
Stage 7, Free Pertland:
Multiple mayhem!
For the first time you'll face an enemy that has more then one unit type and you will start to see a new element of the game appear. You are facing archidons and swordwrath so you have to think about counters to these units. Try to get your swordwrath up close to their archidons and try to get your archidons far away from their swordwrath. You also have the spearton unit which is dominant against both these unit types however more expensive. If you're able to take control of a spearton you should do quite well. The meat shield method should work well for you in this situation.
For the first time you'll face an enemy that has more then one unit type and you will start to see a new element of the game appear. You are facing archidons and swordwrath so you have to think about counters to these units. Try to get your swordwrath up close to their archidons and try to get your archidons far away from their swordwrath. You also have the spearton unit which is dominant against both these unit types however more expensive. If you're able to take control of a spearton you should do quite well. The meat shield method should work well for you in this situation.
Stage 8, Free Westwind:
Spears and spells!
You thought the sword combo was hard? Well you're in for a surprise! Get a swordwrath out ASAP! Take control and kill that first pesky using the zig zag technique you learned in stage 1. You can't afford to lose a miner this early in the game. If you can get a magikill out and combine him with archidons you should be okay because your magikill will stun his speartons and your archidons will take out his magikill, and your combo is better then his.
You thought the sword combo was hard? Well you're in for a surprise! Get a swordwrath out ASAP! Take control and kill that first pesky using the zig zag technique you learned in stage 1. You can't afford to lose a miner this early in the game. If you can get a magikill out and combine him with archidons you should be okay because your magikill will stun his speartons and your archidons will take out his magikill, and your combo is better then his.
Stage 9, No Mans Land:
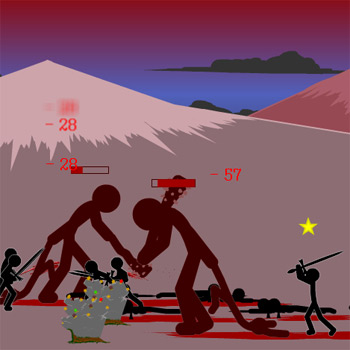 David vs. Goliath!
The key to this stage is controlling swordwrath. You need to get swordwrath out fast and bring them around the back of giants to distract the dumb creatures, this will give the rest of your army a chance to rock him and keep him from moving forward to your statue. A few hits on your statue and you are done, don't let him get close!
Pro tip: When you are controlling the swordwrath you can attack the giant then run around to his back side before he hits you and attack again and continue this over and over.
David vs. Goliath!
The key to this stage is controlling swordwrath. You need to get swordwrath out fast and bring them around the back of giants to distract the dumb creatures, this will give the rest of your army a chance to rock him and keep him from moving forward to your statue. A few hits on your statue and you are done, don't let him get close!
Pro tip: When you are controlling the swordwrath you can attack the giant then run around to his back side before he hits you and attack again and continue this over and over.
Stage 10, Ambush:
Don't die!
Well you remember how to create an army for the ambush right? Invest all your money into miners. But this time there is a twist! A giant is in the mix and attacking your amry, you will need to spend some money on swordwrath and take the giant down while working on your economy. The key here is save enough to get a magikill and a few s. Be warned that magikill take a long time to be created. However, once he's ready he can hold off infantry with his stun spell.
Well you remember how to create an army for the ambush right? Invest all your money into miners. But this time there is a twist! A giant is in the mix and attacking your amry, you will need to spend some money on swordwrath and take the giant down while working on your economy. The key here is save enough to get a magikill and a few s. Be warned that magikill take a long time to be created. However, once he's ready he can hold off infantry with his stun spell.
Stage 11, Ice Hills:
Your confidence is your weakness!
If you haven't noticed by now, right before you take the enemy statue down, they will send a massive wave as a last resort. This can trick you over and over again because you will feel like you've won it, then they send there reserves at you, and you're not ready. I would suggest keeping some gold in reserve, and being ready for anything.
If you haven't noticed by now, right before you take the enemy statue down, they will send a massive wave as a last resort. This can trick you over and over again because you will feel like you've won it, then they send there reserves at you, and you're not ready. I would suggest keeping some gold in reserve, and being ready for anything.
Stage 12, Last Stand:
This is as close to playing another person with the same units as
you as you're going to get until Brock and I make this a multiplayer game!
You're playing against a cunning enemy with archidons, swordwrath,
speartons, magikill, and giants! You're going to have to use everything
you have learned up to this point, use every strategy and trick,
as well as speed and skill.
Just when you thought it was over! What would a good game be without a good twist?
Just when you thought it was over! What would a good game be without a good twist?